Lighting is the language of cinematography. It shapes mood, directs attention, and transforms a flat image into a cinematic experience. Whether you’re shooting a feature film, a commercial, or an indie project, understanding lighting fundamentals is essential for visual storytelling.
Why Lighting Matters in Cinematography
Lighting does more than illuminate a scene—it sets tone, defines space, and influences emotion.
- Mood & Atmosphere: Soft, warm light suggests romance or nostalgia, while harsh, high-contrast light creates tension or danger.
- Depth & Dimension: Proper lighting separates subjects from the background, adding a three-dimensional feel.
- Storytelling: Lighting can indicate time of day, weather, or even a character’s emotional state.
Core Principles of Cinematic Lighting
1. The Three-Point Lighting Setup
- Key Light: Main source of illumination, usually at a 45° angle.
- Fill Light: Softer light to reduce shadows.
- Back Light: Positioned behind the subject for separation.
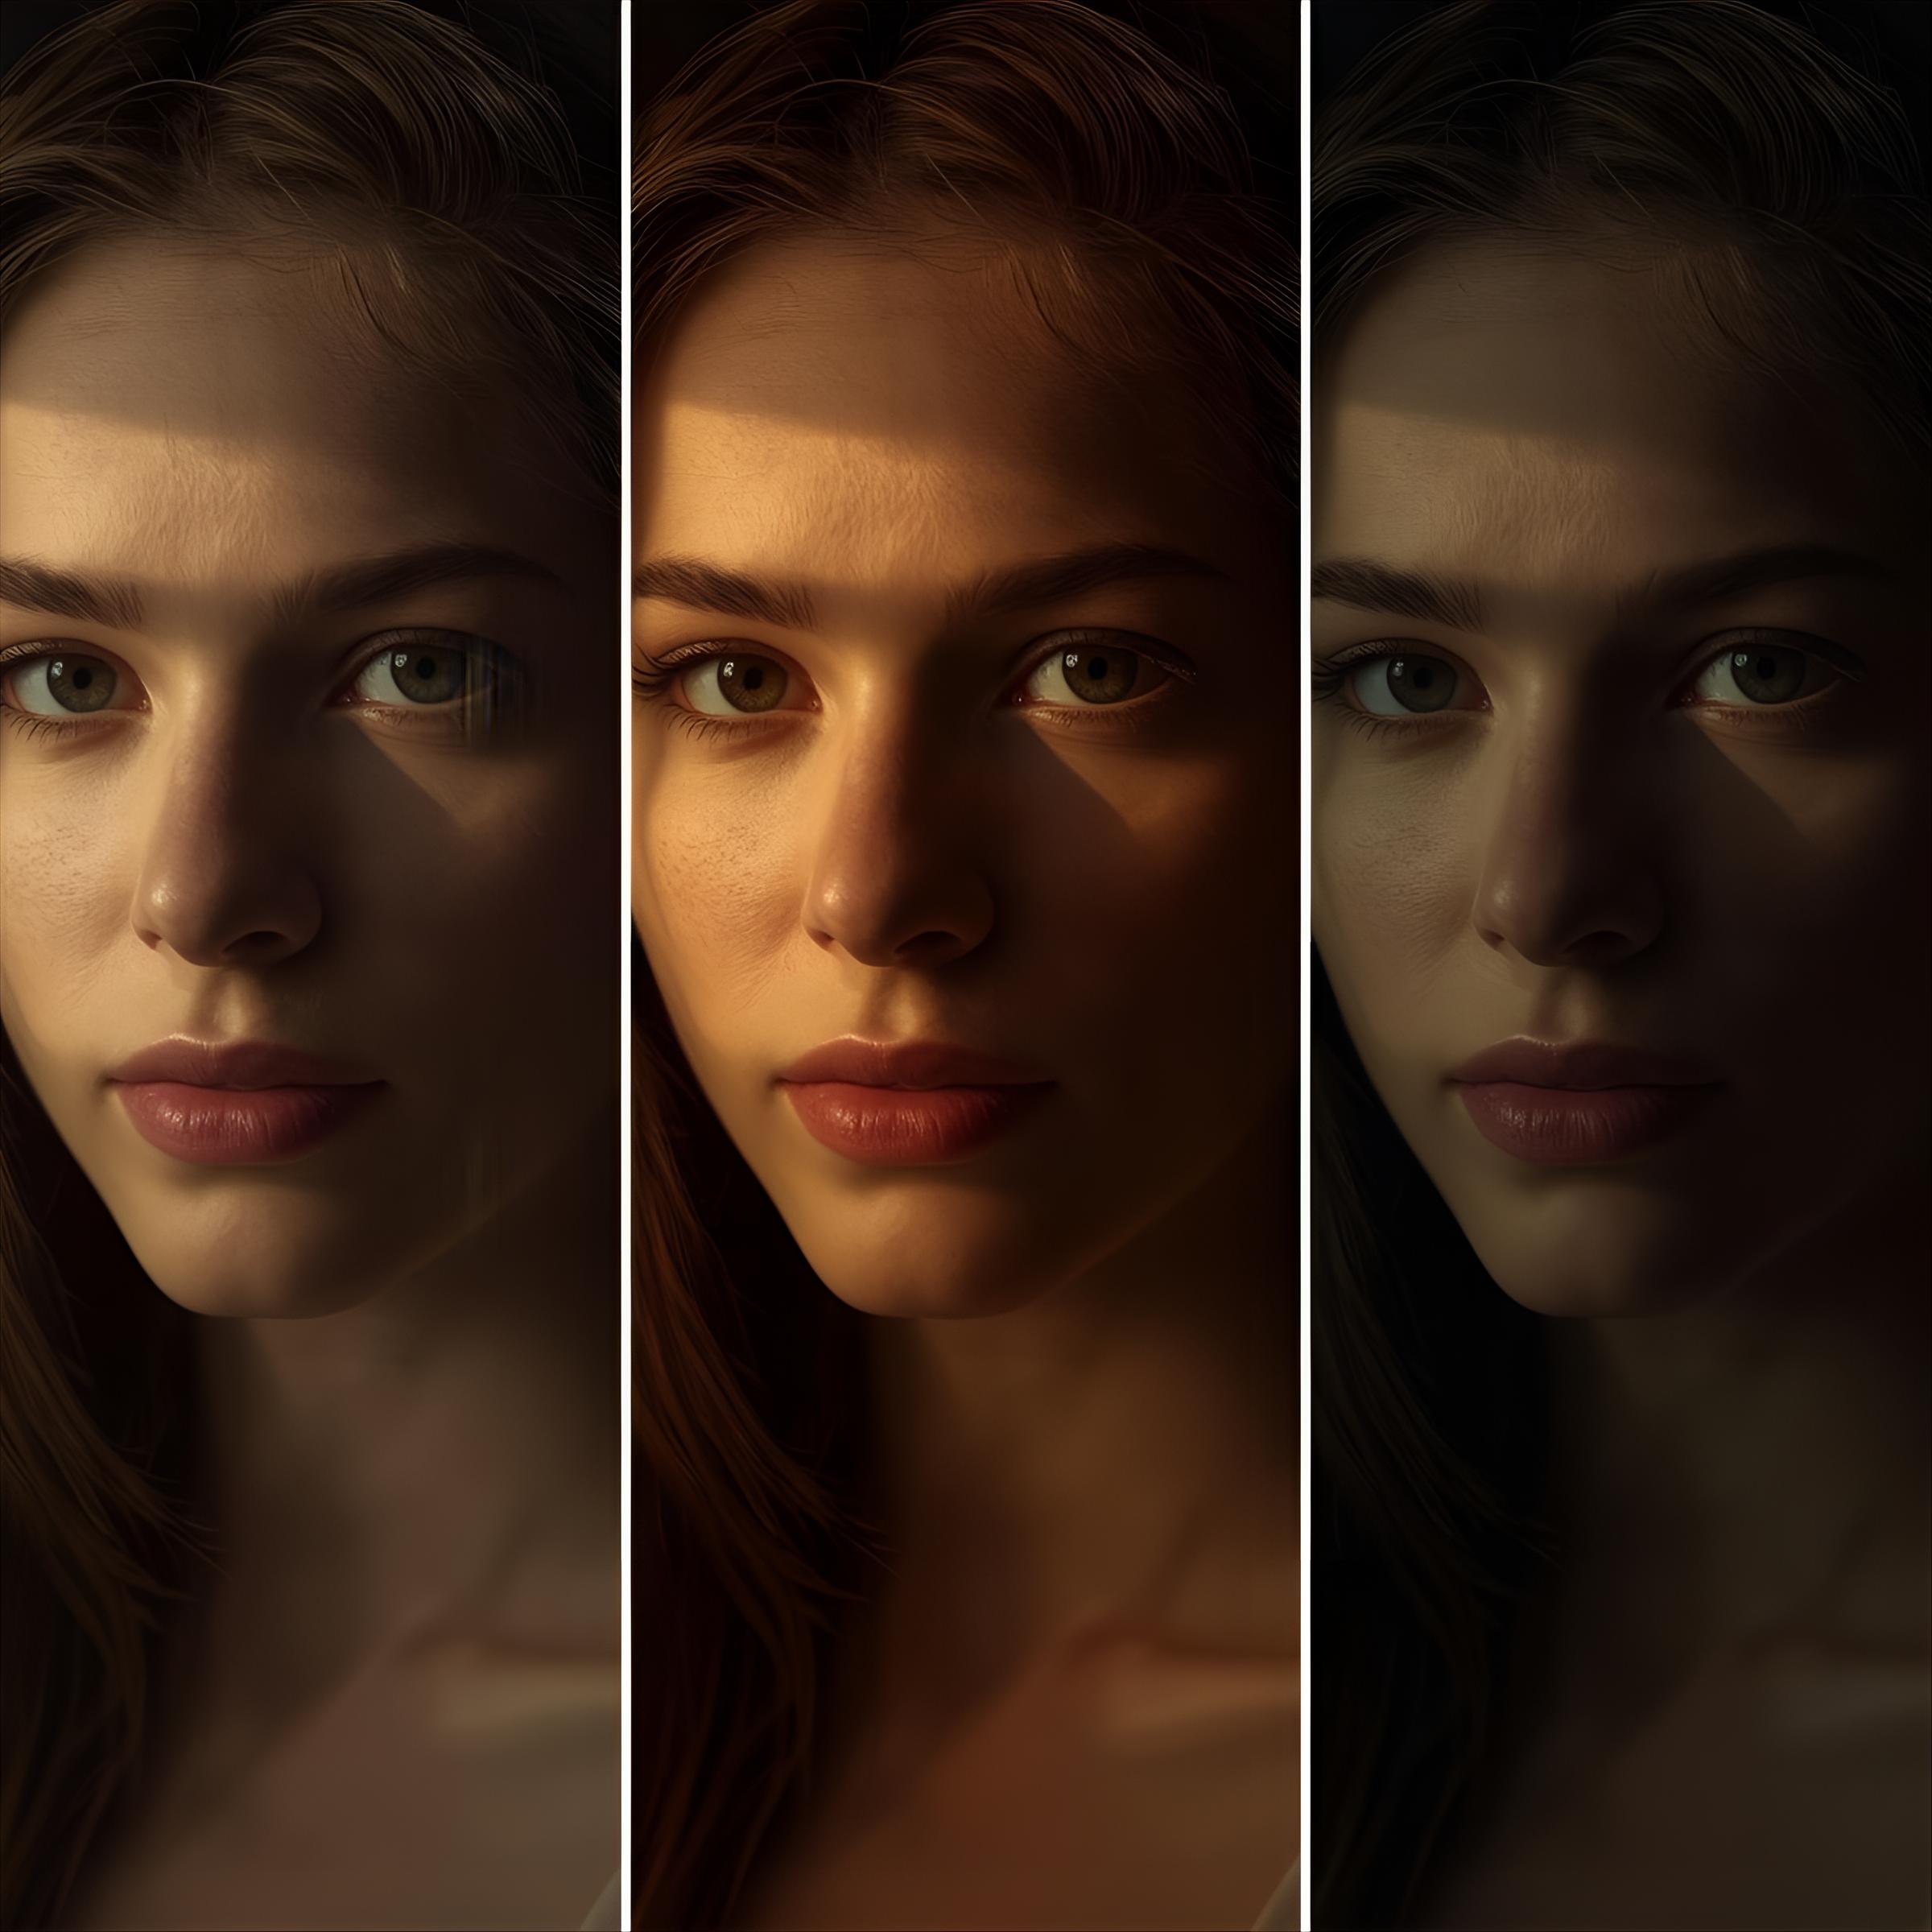
2. Quality of Light: Hard vs. Soft
- Soft Light: Gentle shadows, achieved with diffusion or bounce.
- Hard Light: Creates sharp shadows, ideal for drama.
3. Direction of Light
- Back: Creates silhouettes or rim effects.
- Front: Flattens features.
- Side: Adds depth and drama.
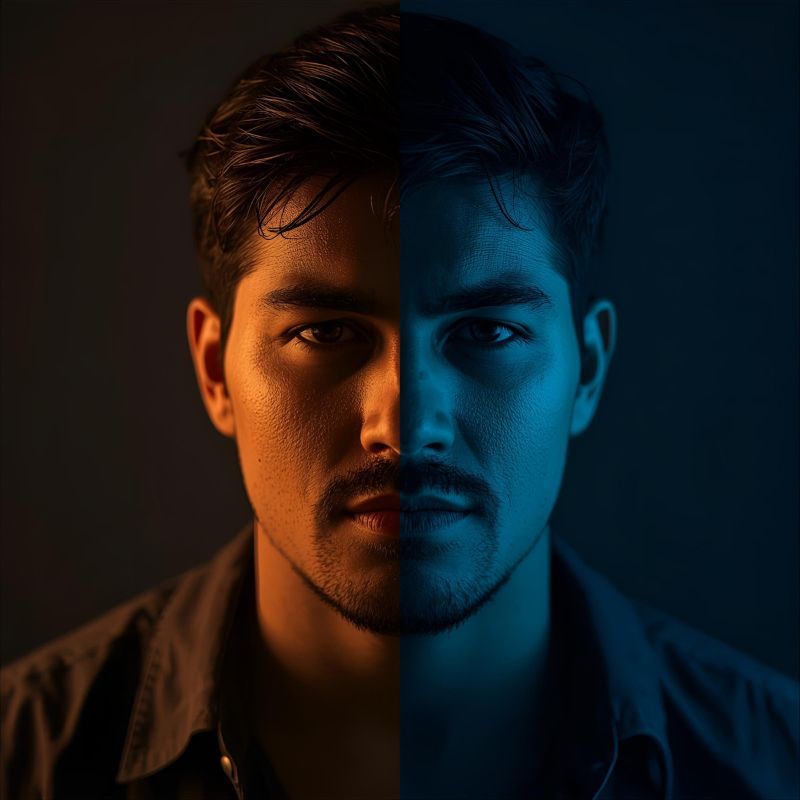
4. Colour Temperature
- Warm (2800K–3200K): Cozy, intimate.
- Cool (5000K–6500K): Crisp, daylight look.
Working with Natural Light
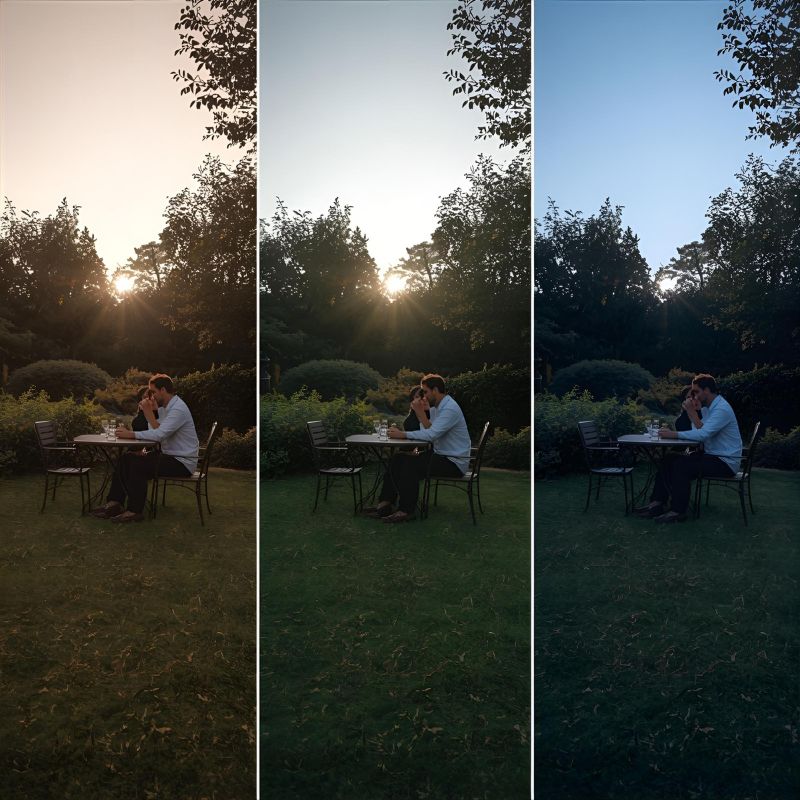
Natural light is free and beautiful but unpredictable.
- Golden Hour: Soft, warm light for cinematic shots.
- Midday Sun: Harsh—use diffusion or shade.
- Blue Hour: Cool, moody tones for drama.
Control Tools:
- Diffusion: Silks, scrims, or translucent materials.
- Flags: Block or shape light for contrast.
- Reflectors: Bounce light (white, silver, gold).
Essential Lighting Techniques
Lighting techniques are the creative tools that help you shape mood, tone, and visual storytelling. Here are four foundational approaches every cinematographer should know:
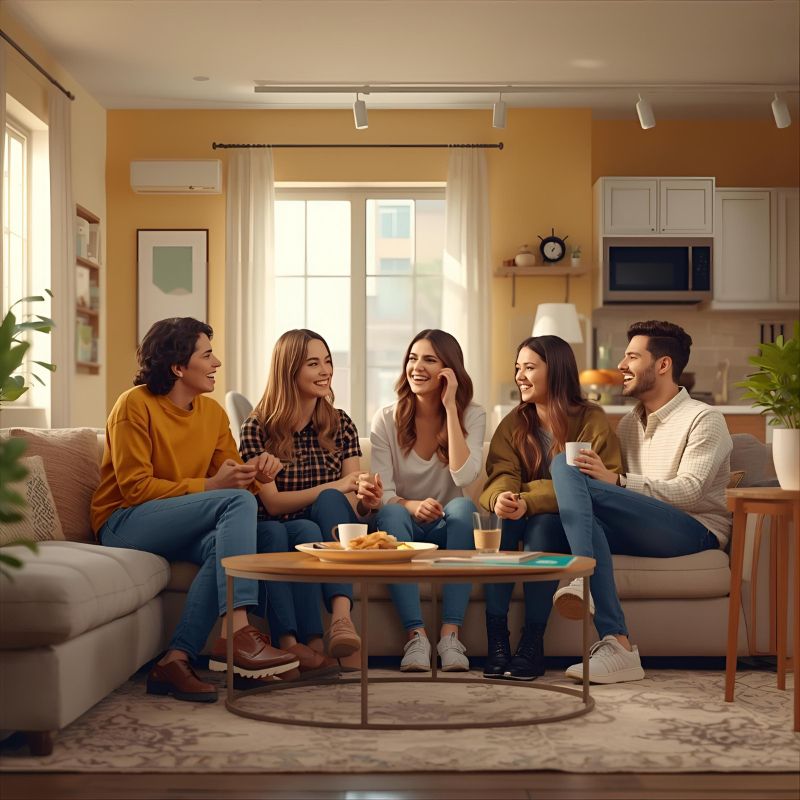
High-Key Lighting
- What It Is: A bright, evenly lit style with minimal shadows and low contrast.
- Purpose: Creates a cheerful, clean, and open atmosphere.
- Common Uses: Comedies, commercials, talk shows, and corporate videos.
- How to Achieve It:
- Use multiple light sources or large soft lights to fill shadows.
- Keep the key-to-fill ratio low (e.g., 1:1 or 2:1).
- Example: Sitcoms like Friends or beauty product ads often use high-key lighting for a friendly, inviting look.
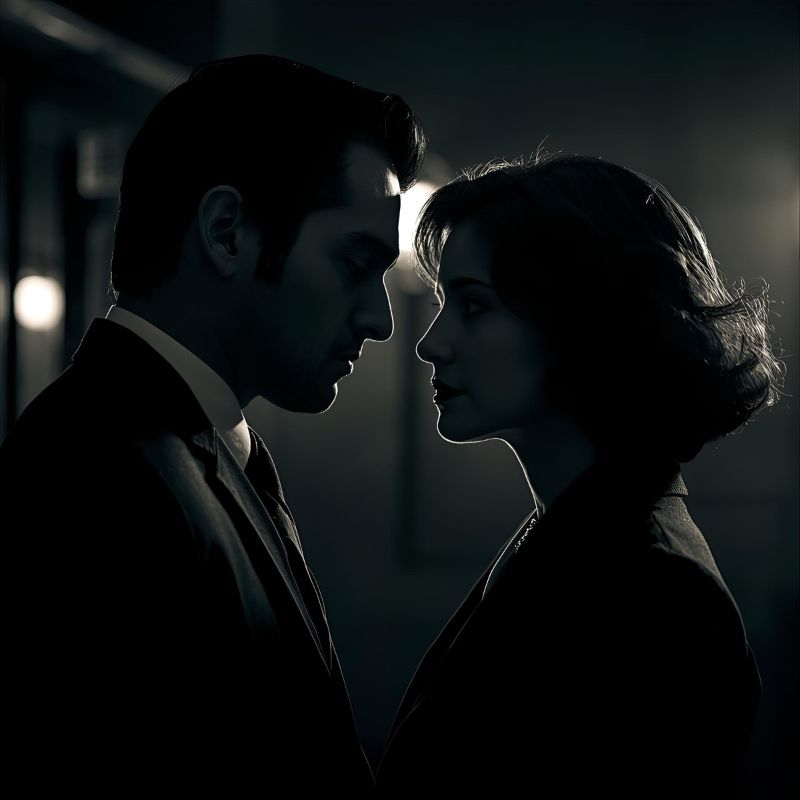
Low-Key Lighting
- What It Is: A dark, shadow-heavy style with strong contrast and deep blacks.
- Purpose: Adds drama, tension, and mystery.
- Common Uses: Thrillers, horror films, film noir, and dramatic scenes.
- How to Achieve It:
- Use a single strong key light with little or no fill.
- Position the light at an angle to create dramatic shadows.
- Example: Classic noir films like Double Indemnity or modern thrillers like Se7en rely on low-key lighting for mood.
Motivated Lighting
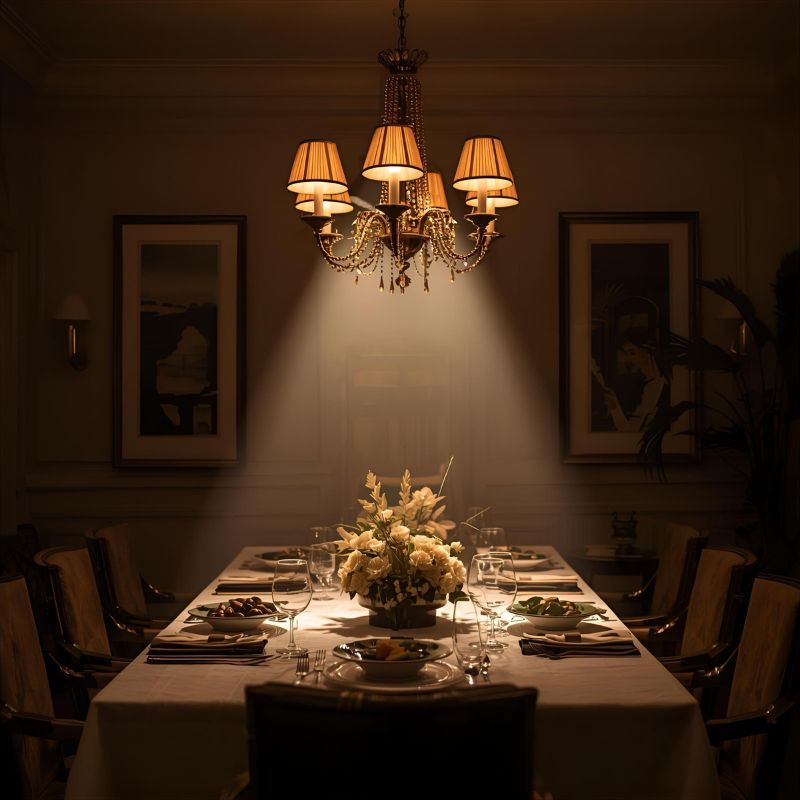
- What It Is: Lighting that mimics a natural or practical source within the scene (e.g., a lamp, window, or candle).
- Purpose: Enhances realism and immersion while maintaining control over exposure and mood.
- Common Uses: Narrative films, dramas, and any scene where believability is key.
- How to Achieve It:
- Place your actual light source off-camera but in the same direction as the practical light.
- Match color temperature to the practical source (e.g., warm for lamps, cool for daylight).
- Example: A dinner scene lit to look like it’s coming from a chandelier, even though the real light is a softbox above the table.
Practical Lighting
- What It Is: Visible light sources within the frame that contribute to the scene’s illumination.
- Purpose: Adds depth, realism, and visual interest.
- Common Uses: Interiors, night scenes, and stylized environments.
- How to Achieve It:
- Use dimmable bulbs or smart LEDs for control.
- Combine practicals with hidden lights to boost exposure without breaking the illusion.
- Example: Neon signs in a bar scene or a desk lamp in an office shot.

Lighting Equipment Basics
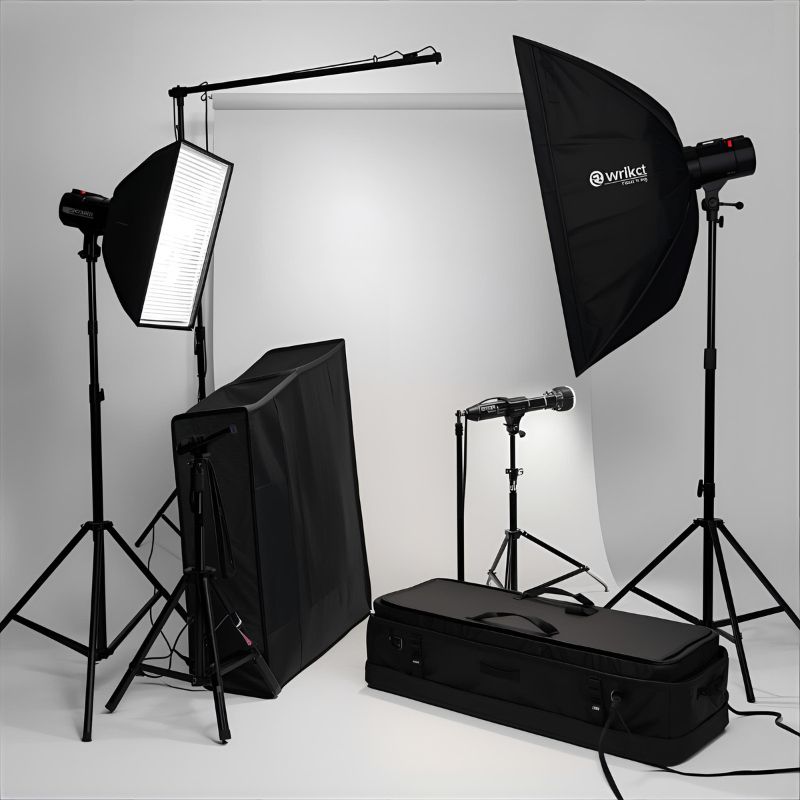
- LED Panels
- Portable, dimmable, and colour-adjustable.
- 👉 Litepanels Gemini 1×1 Hard RGBWW Panel – Professional-grade flexibility.
- Softboxes & Diffusion
- Soften harsh light for flattering results.
- 👉 LEE Filters Diffusion Studio Pack – Popular diffusion materials for various effects.
- Reflectors
- Affordable way to control natural light.
Flags, Grids & Light Control Tools
Flags and grids are essential for shaping light, controlling spill, and creating contrast in cinematography. They give you precision and creative control over how light interacts with your subject and environment.
1. Flags
- What They Are: Opaque panels (usually black) used to block or cut light.
- Primary Functions:
- Block Spill: Prevent light from hitting unwanted areas.
- Create Negative Fill: Absorb light on one side of the subject to add contrast and depth.
- Shape Light: Define edges and control highlights.
- Common Types:
- Solid Flags: Completely block light.
- Nets (Single/Double): Reduce light intensity without changing quality.
- Silks: Diffuse light for softer shadows.
- Practical Example: Shooting an interview outdoors? Use a solid flag to block harsh sunlight from hitting the lens and causing flares.
2. Grids
- What They Are: Honeycomb-like attachments for softboxes or LED panels that narrow the beam of light.
- Primary Functions:
- Control Spill: Keep light focused on the subject without lighting the background.
- Increase Directionality: Maintain soft quality while adding precision.
- Common Types:
- Fabric Grids: Lightweight, attach to softboxes.
- Egg Crates: Rigid grids for LED panels or Fresnels.
- Practical Example: Shooting a dramatic close-up? Add a 40° fabric grid to your softbox to keep light on the actor’s face while leaving the background in shadow.
3. Why They Matter
Flags and grids are the difference between a flat, uncontrolled image and a cinematic, sculpted look. They allow you to:
- Add Mood: Negative fill creates drama.
- Prevent Light Spill: Essential in small spaces or when using multiple lights.
- Direct Viewer Attention: Focus light where it matters most.
Pro Tips
- Always carry a flag kit with solids, nets, and silks.
- Use C-stands with grip arms for flexible positioning.
- Combine grids with diffusion for soft yet controlled light.
Gels & Filters
Gels are essential for colour correction, creative effects, and exposure control.
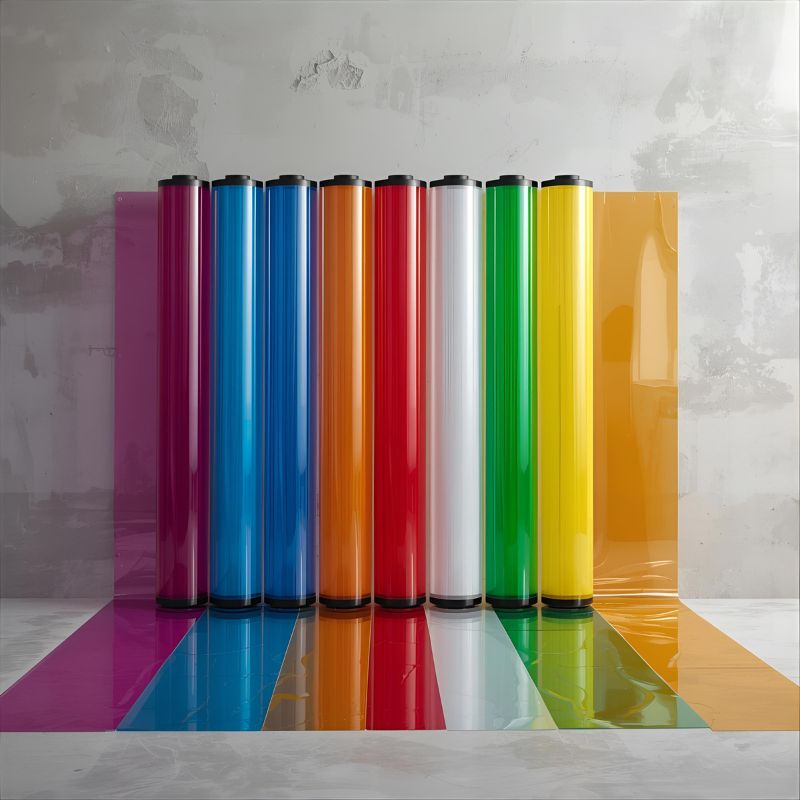
Common Gels
- CTO (Colour Temperature Orange): Converts daylight to tungsten.
- CTB (Colour Temperature Blue): Converts tungsten to daylight.
- ND (Neutral Density): Reduces intensity without colour shift.
- Diffusion Gels: Soften light (Opal, Frost, Tough Spun).
- Plus/Minus Green: Correct LED or fluorescent colour casts.
- Colour Effects: Add mood with vibrant hues.
Pro Tip: Combine gels for custom looks (e.g., ND + CTO for dimming and warming).
👉 Recommended Kits:
- LEE Filters Master Location Pack – Includes CTO, CTB, ND, diffusion, and effect gels for on-set versatility.
- LEE Filters Daylight to Tungsten Pack – Perfect for balancing mixed lighting.
- Rosco E-Colour Diffusion Rolls – Professional-grade diffusion for large setups.
Final Thoughts
Lighting is both an art and a science. Start with the fundamentals—three-point lighting, colour temperature, and diffusion—then experiment with gels and modifiers to create your signature look.