If you’ve worked in television broadcasting or live events, you know how important a quality lapel microphone can be. These small, discreet devices are essential for capturing up-close audio, and their mobility makes them a vital part of any broadcaster’s arsenal.
But lapel mics are also notoriously finicky—without proper accessories and planning, outdoor sounds like wind, as well as rustling clothing, can ruin your chances of capturing the audio you want.
If you’re shopping for your next lapel mic, you’ll want to keep these tips in mind to make sure you make the right purchase and get the best sound quality possible.
1. Choose the right spot, and do a proper soundcheck
The location of your shoot has a big impact on the quality of sound you’ll be able to capture with a lapel mic. You want to choose the most sheltered location possible—if you have to be outdoors, look for alcoves or covered spaces that will protect the mic from the wind.
You’ll also want to check the surrounding area for ambient noise that may be problematic. Shooting at the beach might sound like a good idea until you realise the squawking seagulls are going to drown out the audio you want.
Keep an eye out for things like external fan exhausts, busy roads, pedestrian noise, or construction work that may interfere with the sound you want. Sometimes, shooting earlier in the morning or later at night (if you dont need natural light) makes it easier to find quiet spaces.
2. Think carefully about wardrobe choices
In addition to eliminating external sounds, you’ll also need to think carefully about the wardrobe selections for your on-screen talent. Because lapel microphones are worn close to the body, it’s easy for them to pick up the sound of rustling clothing.
Before you go to the shoot, it’s a good idea to speak to wardrobe manager (or the talent directly if they are choosing their own wardrobe) to make sure they eliminate the chances of clothing interference. Advise them against wearing:
- Jewellery that clicks or jangles
- Loud fabrics, like those with sequins or tulle
- Light and thin fabrics like silk that will fold under a lapel mic’s weight
- Form-fitting clothing that will show a bulge from the wires/pack of the mic
- High or beaded/jewelled necklines that will cause the mic to sit at an awkward angle
3. Use a protective cover to reduce sound interference
Even with a well-chosen spot and the right wardrobe, you may still encounter problems with sound quality, unless you have some accessories to better protect your lapel mic.
Fortunately, there are many options available to best suit your needs. It just depends on how you plan to use the microphone, and what size mic you are using.
If you are using a smaller lapel mic like the Sanken COS11D, anything from the DPA 6000 range, or the Sennheiser MKE 2, we highly recommend a Rycote Overcover. These covers are excellent options when you need to protect your lapel mic from external noise and clothing contact, while also keeping it hidden from camera.
If you have a slightly larger microphone, you can look at the bigger lapel mic overcovers from Rycote. And if you aren’t too concerned about the microphones being visible on camera, then the fluffier covers like the Rycote Windjammers are a great choice. These come in multiple colours, so you can camouflage them against different wardrobe pieces for maximum discretion and protection.
You may also want to consider a PSC Hush Lav. These are conical foam pieces, with a pre-cut centre that allows you to push the microphone up inside. Once the sleeve is on, the mic capsule will appear just outside the foam to capture high-quality audio, while reducing any unwanted noise from wind or clothing.
4. Consider how you mount the lapel microphone
How and where you mount your lapel microphone can also have a big impact on the quality of audio you are able to capture.
Typically, you have two options when attaching lapel mics: You can attach them to a piece of clothing, like a collar, lapel, or tie; or you can attach them directly to the skin using tape or other safe adhesives.
If you want to attach the mic to clothing, we recommend checking out the range of Viviana beetle mounts. These clips are designed to attach lapel microphones to clothing, while reducing visibility on camera and the amount of unwanted noise picked up.
The Rycote overcovers we mentioned earlier are an excellent option if you plan to attach the microphones directly to skin. They come with stickies, which are safe to place onto skin directly, and they’ll keep the microphone in place while protecting it from rusling clothes and other sounds.
5. Have multiple options so you are always ready to go
If you are frequently in charge of audio equipment on film or television shoots, then our best piece of advice is to make sure you have lots of options on hand for lapel mics and lapel mic accessories.
If you have a number of different sizes and colours, as well as a variety of lapel wind protection devices, you can rest easy on set knowing you’ll have what you need to capture the best audio quality possible.
John Barry Sales is always here to help you with any of your video and audio equipment. Browse our full range of lapel microphones and lapel microphone accessories today, and find the option that’s best for you.
-
Sanken COS11D Lapel Mic Sennheiser EW Black
Sanken Cos11D Lapel Sennheiser Ew Sanken Microphones introduces the COS-11D New Generation Lavalier Microphone.Sanken has introduced the COS-11D, a new version of the popular lavalier which overcomes digital transmitter RFI (radio frequency interference).In today’s wireless transmission systems the microphone must remain unaffected by new forms of digital transmitter signals. While the benefits of these new systems are obvious, they present new challenges in the area of emission protection. In many cases, noise levels increase and the S/N ratio is deteriorated by the interference of digital transmitters. Sanken has designed the COS-11D specifically to diminish the instances where interference is an issue.The new COS-11D joins the COS-11 tradition of providing an ideal solution for live broadcasting, location recording and studio applications.The COS-11D features a front mesh screen which is Water Resistant, better protecting the microphone from perspiration and cosmetics. As a result, the COS-11D maintains superb frequency response in adverse recording conditions. In addition, the water resistant COS-11D is ideal for outdoor shooting in foul weather.To provide a wide scope of applications, four colors are available in the COS-11D series: Black, Grey, Beige and White.** Microphone is supplied with connector to suit Sennheiser$ 617.00View Product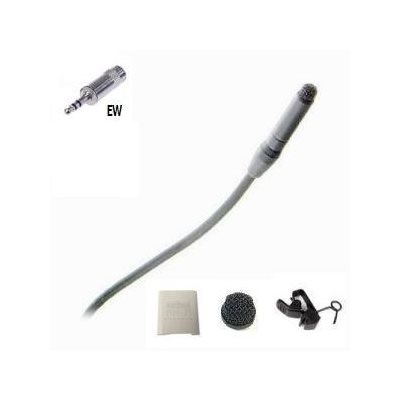
-
Sennheiser MKE-2 Gold Omnidirectional Lapel Microphone with XLR – Black
Sennheiser Mke2-P-C Lapel Mic The MKE 2 PC is a high quality, sub-miniature clip-on lavalier microphone (approx. 4 mm diam.) which has a multitude of applications where other clip-on microphones prove too obtrusive because of their larger size, ideal for television broadcast and theatrical productionsIt fulfills the most stringent sound quality demands and is extremely robust. It is suitable for both speech and instrument miking applications in all areas of live work.Its accurate frequency response produces natural, uncolored sound.A unique Umbrella Diaphragm delivers moisture-resistant performance with the identical high audio quality of the industry standard MKE 2 lavalier.Its size makes it not only unobtrusive and easy to conceal, but also offers a textbook perfect omni-directional polar pattern.An extremely thin low mass diaphragm exhibits extraordinary transient response. The microphone also comes with two additional sound inlet caps to tailor the high frequency as needed. Color: matte black.Successor to the “Broadway-proven” MKE 2 Red DotFeatures Dual-diaphragm design virtually eliminates “sweat-outs” Flat frequency response Stranded, stainless-steel reinforced cable provides maximum strength and low contact noise Acoustical equalization via supplied end caps 1-year warranty$ 599.01View Product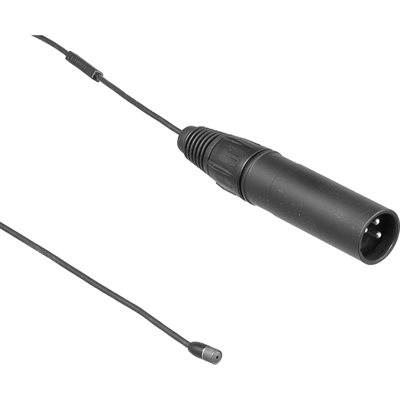
-
Rycote Overcovers Mix Colours – 6 Fur Discs, 30 Stickies Original
RYCOTE MIX COLOURS OVERCOVERS – PACK OF 30 USES Suitable for Lavalier MicsOvercovers have been specifically designed for use with small personal microphones in windy outdoor conditions.Using stickies to affix the Lavalier Mic onto the skin or on top of clothing, Overcovers also include a fur Windjammer (Furry) to be adjusted on top of the Lavalier microphone for excellent wind-noise protection. Overcover packs contain 30 Stickies and 6 re-usable fur discs, including 2 of each colour: white, grey & black$ 22.99View Product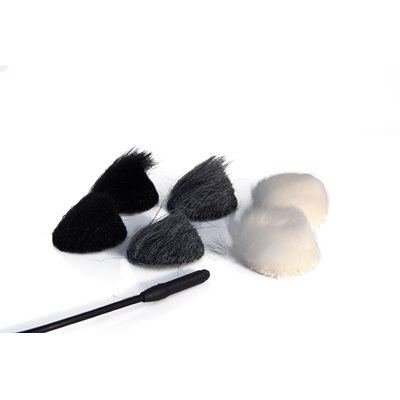
-
Rycote Black Ristretto Lavalier Windjammer – Pair
RYCOTE BLACK RISTRETTO LAVALIER WINDJAMMER – PAIRTie-pin, or Lavalier microphones as they are widely known, are ideal for discreet use in broadcast interview situations, their compact dimensions ensuring that they do not draw the eye on camera. Their convenient size means that they are even used by some radio broadcast engineers, despite their appearance not being an issue in that medium.In studio environments, Lavalier microphones are commonly used without foam wind covers, but when recording interviews outdoors, Lavaliers are just as prone to the deleterious effects of the wind as any other microphone, and a windshield is required to prevent the wind rendering the interview audio unlistenable.Rycote have manufactured a popular Lavalier Windjammer for many years, and are continuing to do so, but in recognition of the fact that most broadcasters today prefer their microphones to remain as unobtrusive as possible, a re-engineered version of that Windjammer has now been added to Rycote’s product line which is more discreet on camera.The fur on the new Ristretto, as it is known, is considerably shorter than that on Rycote’s existing Lavalier Windjammer. Like the existing Rycote Lavalier Windjammer, the Ristretto is secured to its microphone by a foam connector, but a rubber ring has now been added to both products for better grip and retention$ 54.00View Product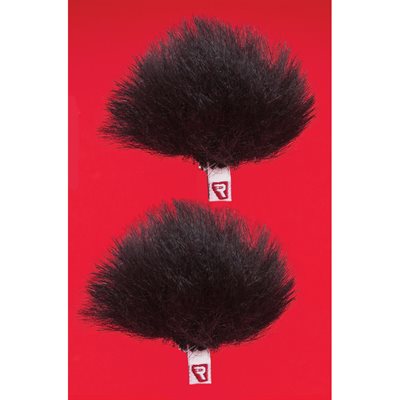
-
Garfield Hush Lav Lavalier Microphone Quieting Sleeves – White
Psc Hush Lav – White Hush Lavs™Hush Lavs™ are precut and drilled lavalier mic quieting sleeves used for recording clean audio with radio lavalier mic’s. They minimize clothing noise and thereby achieve your goals. Hush Lavs™ are available in white or black for wardrobe matching. They are designed for use with the Sanken COS-11 and Countryman B3 and B6 Lavalier Microphones.Packet of 15$ 23.00View Product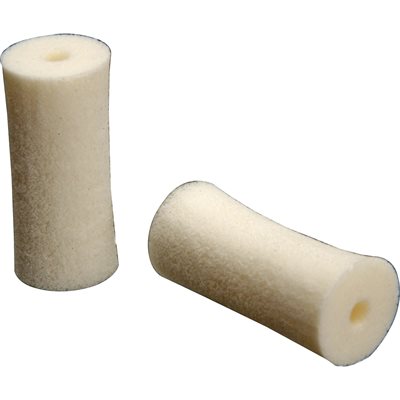
-
Viviana Beetle bra clip white
The Viviana Beetle can be paired with all the beetles accessories like our bra clip a to guarantee the maximum versatility in just on click.Morover all the beetles accessories are compatibile with all the beetles concealers.The Viviana Bra clips are available in two colours: white or black$ 25.00View Product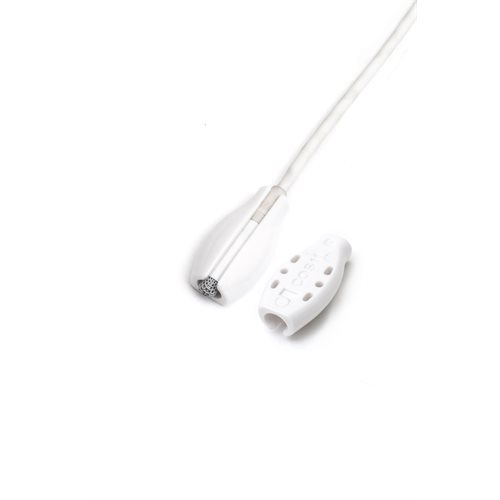
-
Sanken COS11D Lapel P48 XLR Black 3m cable
SANKEN COS11D LAPEL P48 XLR BLACK 3 MRFI RejectionWater-ResistantSubminiature CapsuleWide Frequency ResponseThree-pin XLR Connection48V Phantom PoweredBlack Finish$ 667.00View Product